
You have just installed Mountain Lion Server, now what!? Going on the assumption you are staring at Server.app right after a clean install, the first thing that needs attention is DNS!
There is no faster way to make things difficult for OS X (and OS X Server) than to have bad DNS information. This has been true since the beginning of OS X so this shouldn’t come as a surprise. However, what is new with Mt Lion is that we get to configure DNS via the newly updated Server.app.
DNS Setup
Your window of Server.app may vary from the images below, but in the end we should have somewhat the same settings. First thing is to make sure that you have Server.app up and running. Yes, you read that correctly… Server.app. At first you might fight this, but most of the features of running a DNS server are available, plus some added love for IPv6!
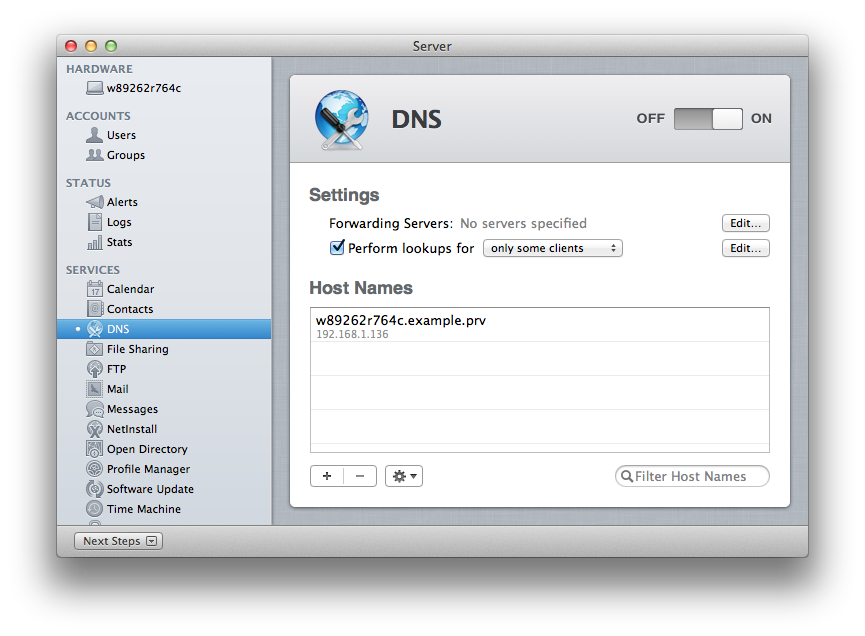
When we look at a newly installed Server that didn’t have any DNS information to verify the server will automatically configure DNS for itself and start the DNS service. You first want to apply some “Forwarding Servers” so you machine (and any client/server using this as the primary DNS server) can find information outside your network. Some common Forwarding server are:
- Google: 8.8.8.8 and 8.8.4.4
- OpenDNS: 208.67.222.222 and 208.67.220.220
- Your ISP: (find two)
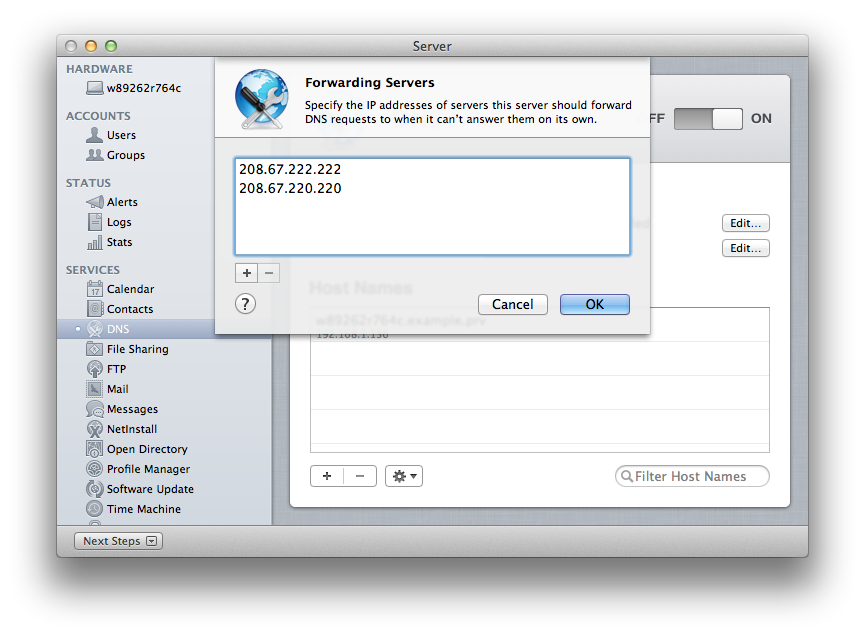
These are the same settings that you would have performed in Server Admin => DNS => Settings, but what took you a couple of clicks to get to the configuration pages is now displayed on page one in Server.app; Improvement!
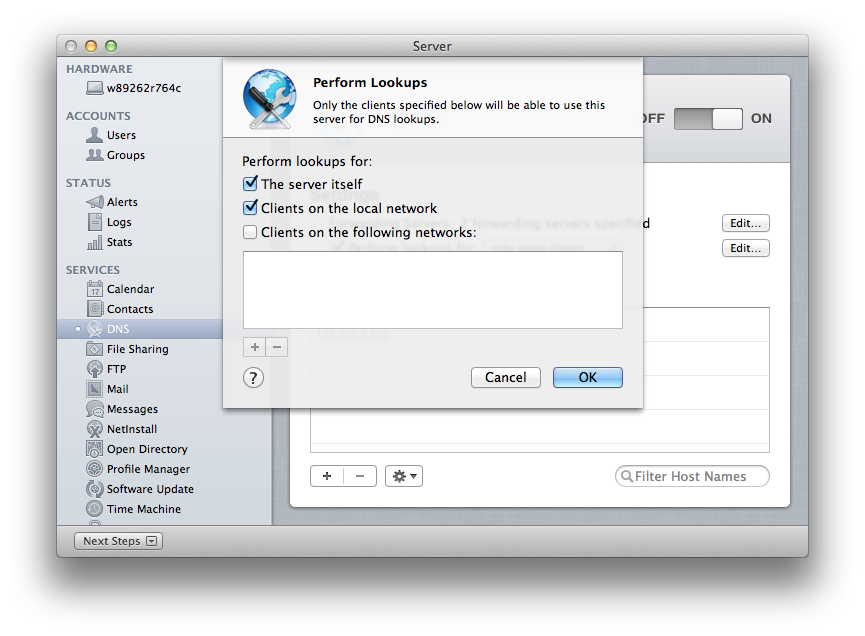
By default the server will provide DNS information to clients within the same subnet as the server is running AND itself. These are the same defaults that come in Server Admin (f.k.a localhost and localnets). You can always add additional network segments if needed, just like you could before.
Finally we get to add some records!
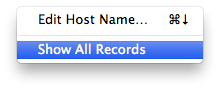
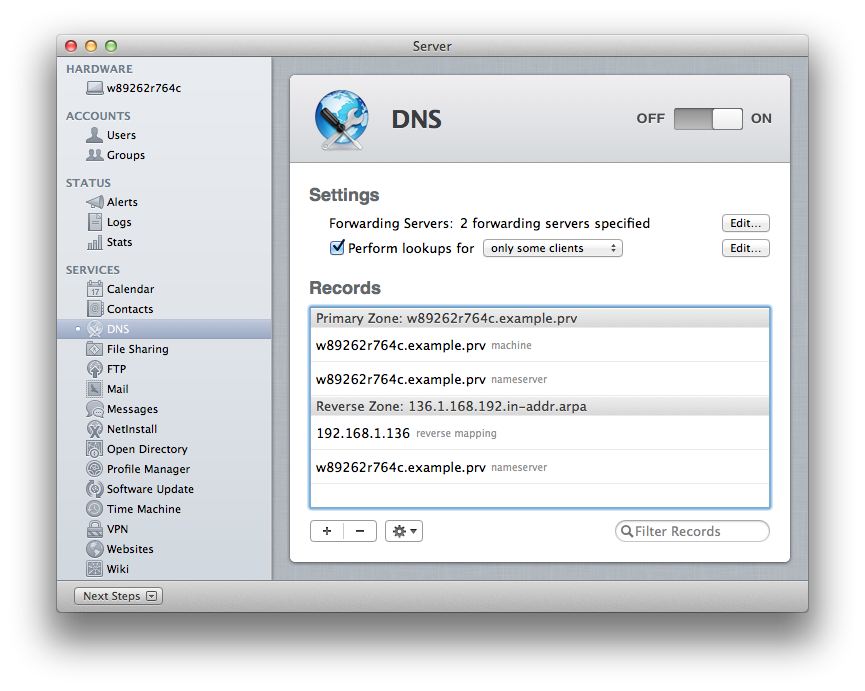
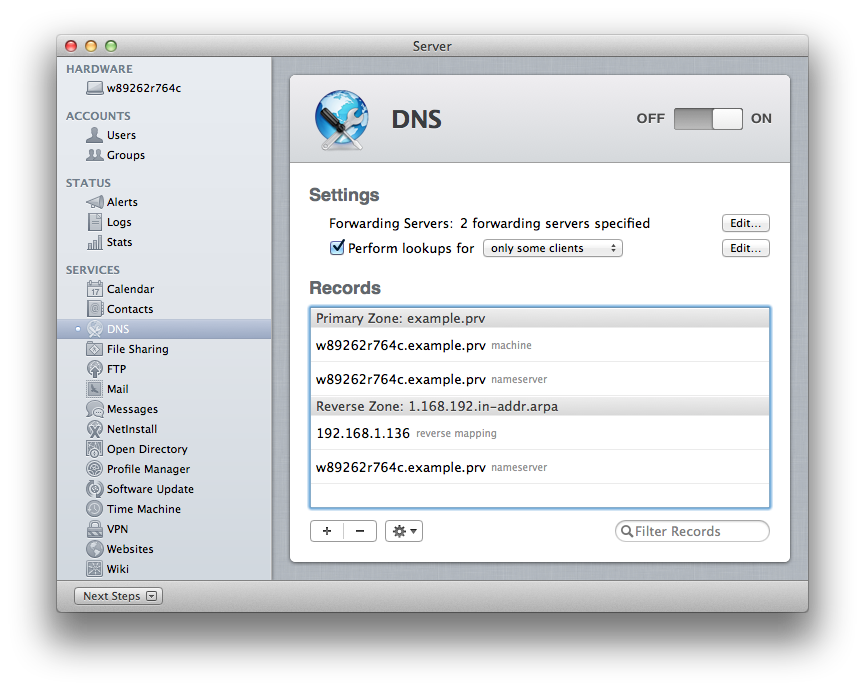
First of all, just like previous version of OS X if you let the server automatically configure DNS for you during installation, the DNS settings are slightly off. It only creates a zone for the server’s FQDN vs. specifically the domain (which is what you want in the first place). This can be seen by clicking on the gear icon and choosing “Show All Records”.
At the very top in gray you should see “Primary Zone: FQDN” (with FQDN being the server’s full DNS name). During the Server Assistant setup process, the server could not verify the provided IP address and hostname, thus to protect itself it created these DNS records, however, they are not correct for hosting DNS information for other clients. So how do we fix this? Disable the “Show All Records”, select your server FQDN, and click on the minus button. Select Delete on the warning screen that is displayed when trying to delete a record. Now click on the plus button and re-add your server’s FQDN and IP address. This time, it will make your zone file as the domain name vs. the FQDN of the server name.
 Before
 After
After
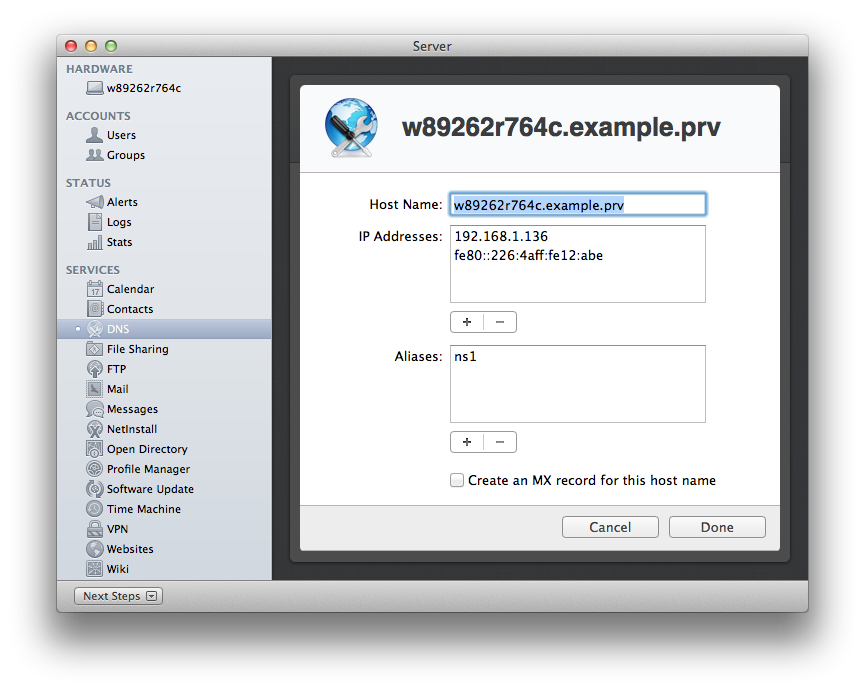
To add additional DNS entries, continue adding names via the plus sign button. If there are machines that need Aliases (or more commonly known as CNAME), you can add just the alias host name vs. the FQDN. In addition you can also mark specific servers for mail by checking the MX checkbox at the bottom. Lastly, you’ll notice that the new DNS window will allow multiple IP address for one DNS record. This can be done for load balancing purposes OR we can also add IPv6 addresses!
To find your IPv6 Address, you can open System Preferences => Network => Advance and choose “Link-local only” in the Configure IPv6 drop-down option, or:
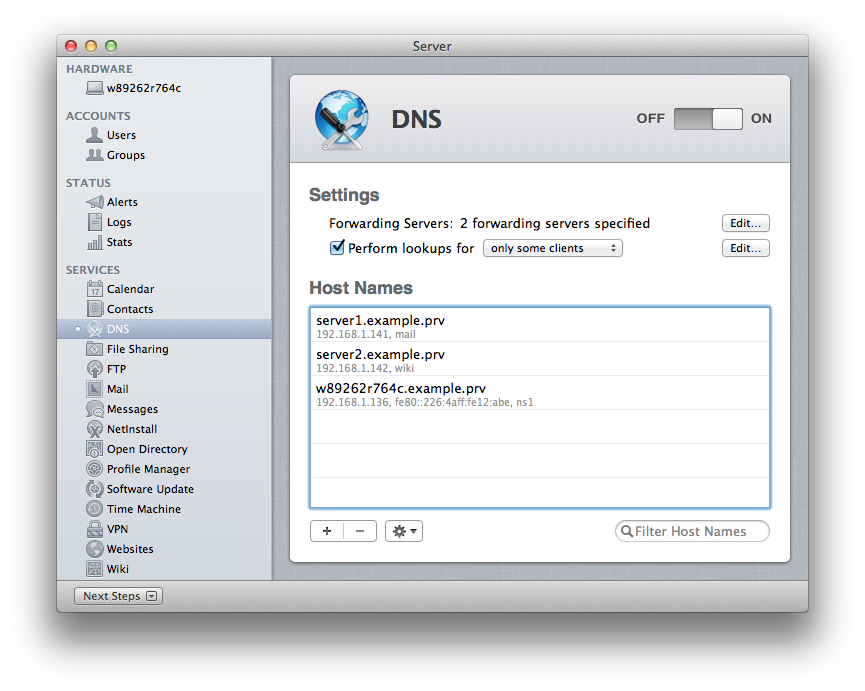
$ ifconfig en0 | grep inet6 | awk -F " " '{print $2}' | sed 's/%en0//'Copy/paste the result as a second IP address for the desired DNS record. Once you are done, you should be able to see all your DNS records in black text and just below all associated IP addresses (IPv4 and IPv6) along with any aliases.
Test and Verify
The RAW DNS text files (which are provided by the open source tool BIND) are in /private/var/named, and you are able to see the following DNS records (or at least something similar as your setup may differ from mine):
db.example.prv
db.1.168.192.in-addr.arpa
db.b.a.0.2.1.e.f.f.f.a.4.6.2.2.0.0.0.0.0.0.0.0.0.0.0.0.0.0.8.e.f.ip6.arpa
A quick export of my db.example.prv shows the following information:
- The zone name is correct as “example.prv” is listed first (top left of the image)
- The Admin email address is incorrect: admin.example.prv, but that is not critical
- My Nameserver is correct: NS=w89262r764c.example.prv
- My Mail setting is correct: MX=server1.example.prv
- My IPv6 address for w89262r764c is correct: AAAA fe80::226:4aff:fe12:abe

The one thing that I notice that I cannot do is create a SLAVE DNS server. My only guess is Apple assumes if you are redundancy focused environment then you are using something other than OS X server. Not to say this is not possible as you would simply have to modify the /etc/named.conf file and list the zone type as “slave” vs. “master”, there is just no GUI method to do this.
Footnotes
- Most likely you are either updating an existing Server or promoting a Client to a Server. In either case, /Applications/Server folder has been deleted. Be sure to keep a copy of Server Admin tools if you need to control any servers that have not been upgraded.
- There has been a long history where Mac Administrators have misconfigured DNS, thus their server admin tools (i.e. Server Admin, Workgroup Manager, Server Preference, etc) did not function correctly because DNS was wrong. In order to make sure Server.app works from the start, Apple has begun to check if DNS is correct by doing forward and reverse DNS lookups from the provided IP and hostname information that was assigned during the Server Setup Assistant.
Comments are closed. If you have a question concerning the content of this page, please feel free to contact me.


Comments
Mark Ma
Great guide, thanks!
One question I have is that do you see Server app giving you “The host name has changed” alert every time you reboot the machine? This only start to happen when DNS is enabled. In its detailed message it says “The host name of this server has changed from sever to server.home.private. Some services may not work properly bla bla…”.
Nothing I have tried have worked. I have this issue from a fresh install.
Justin
If this is a home server, and you have only one DNS server… be sure your Ethernet DNS Network settings are set for “127.0.0.1” on the server. Your clients will point to your servers internal IP address (e.g. 192.168.x.x/24).
Mark Ma
Hmm..I did check those. Also I have Airport Extreme and Mt Lion Server auto configures it to make sure it has the correct DNS for its DHCP clients. Still doing this alert thing very annoying. I had to disable Push and Email notifications for the time being.
Scott Girard
Mark: I am seeing the same thing– you’re not the only one. Also, my setup sounds a lot like yours except that I upgraded from Lion Server. I am also behind an Airport Extreme.
Mark Ma
Hi Scott, I’m still doing different experiments to solve this. looks more like a bug to me now. Do you have any luck?
Ben
Just a suggestion: I like making the new zone before deleting the old zone. It keeps the lookup for the server available the whole time in case you need to hit save and get out of there before finishing the whole setup.
Justin
Excellent point Ben.